
材料
模块:ESP8266-01
烧录器:USB转TTL
软件:Arduino IDE 1.8
Arduino IDE支持ESP8266
方法一:通过Arduino下载(网络非常慢)
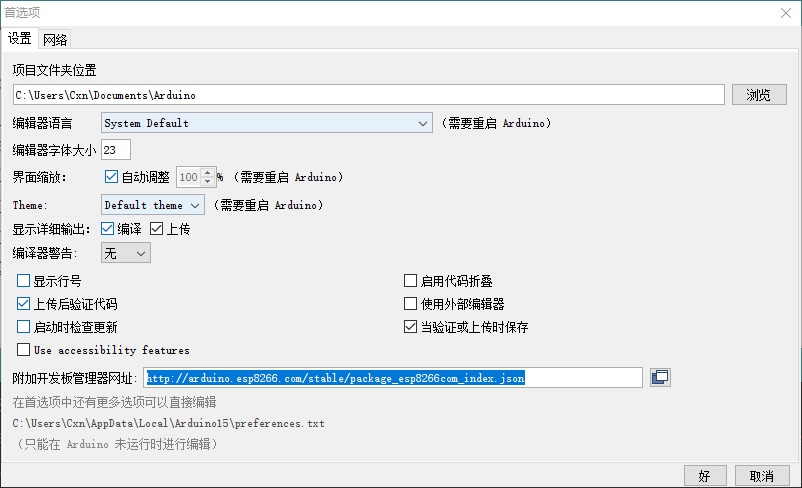
文件->首选项,找到"附加开发版管理器网址",填入http://arduino.esp8266.com/stable/package_esp8266com_index.json
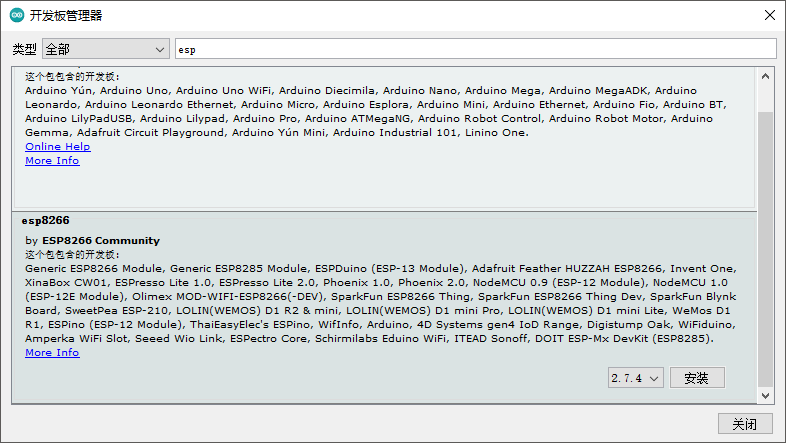
然后在 工具->开发板->开发板管理器 中搜索esp,找到esp8266 by ESP8266 Community,安装即可。
方法二:Git(结合Gitee)
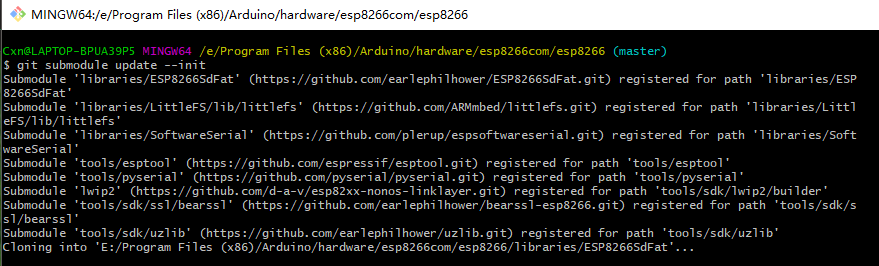
进入目录Arduino安装目录/hardware敲入以下命令
1 | #参考:https://arduino-esp8266.readthedocs.io/en/latest/installing.html#using-git-version |
所有库的地址:
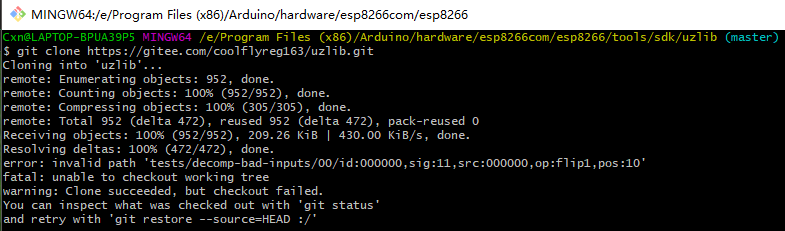
uzlib的问题:
然后下载编译工具:
1 | cd esp8266/tools |
发现有一个文件下载奇慢:

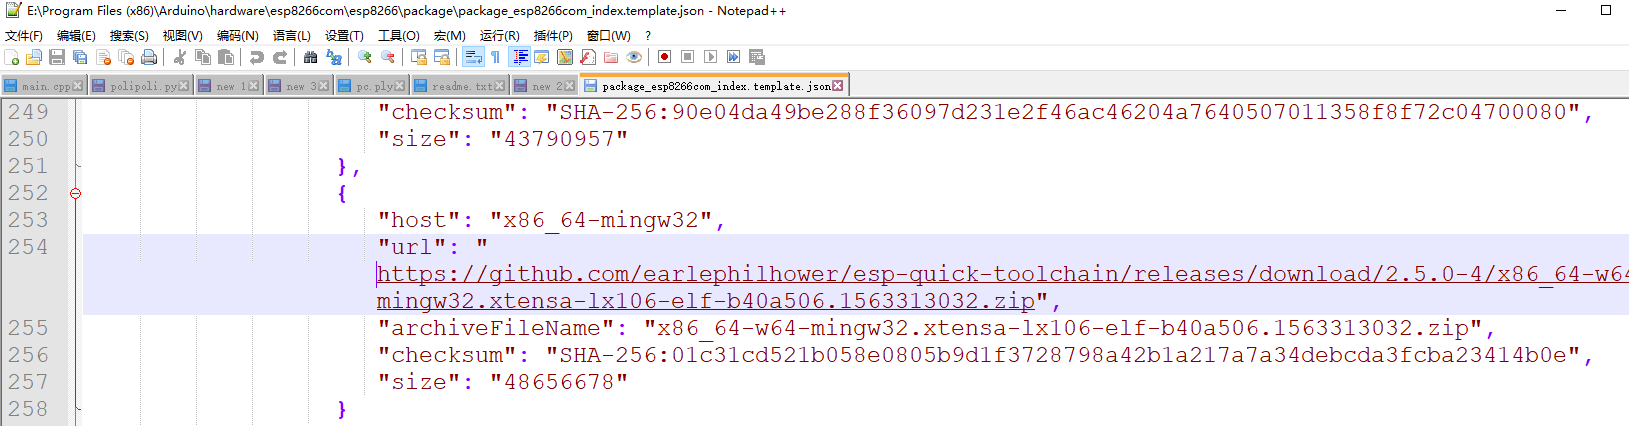
根据上面的Platform,打开文件esp8266\package\package_esp8266com_index.template.json,可以看到这个文件的源地址:
通过其他工具下载到esp8266/tools/dist即可

再次运行get.py即可。

启动arduino,在工具中可以看到ESP8266开发板
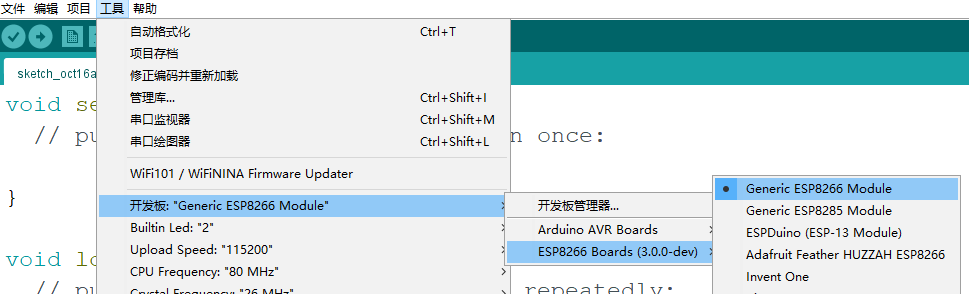
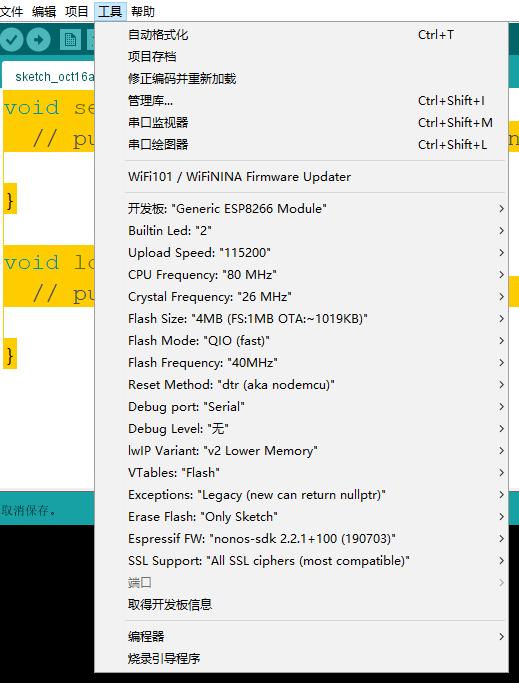
其他设置按照图中设置:
运行例程
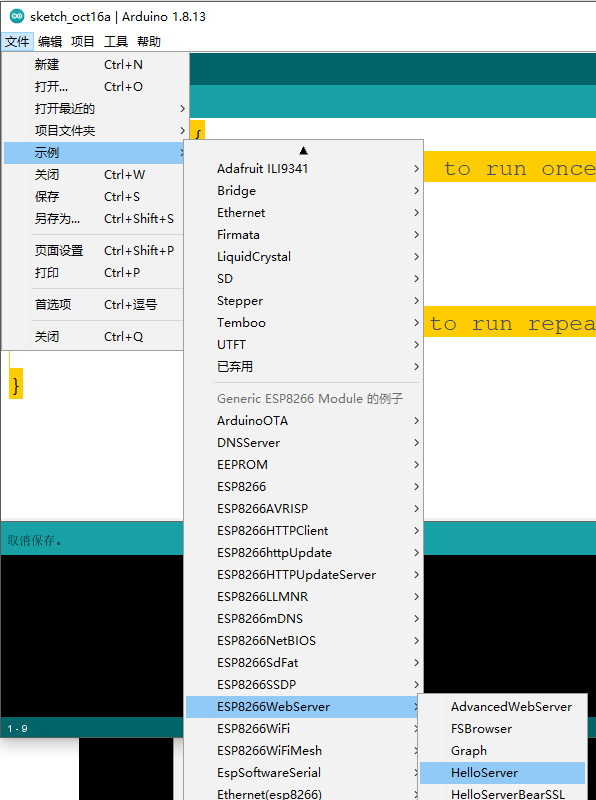
在 文件->示例 中找到 HelloServer 程序
修改自己的WIFI和密码,这个是STA模式,连接WiFi开启Http服务器
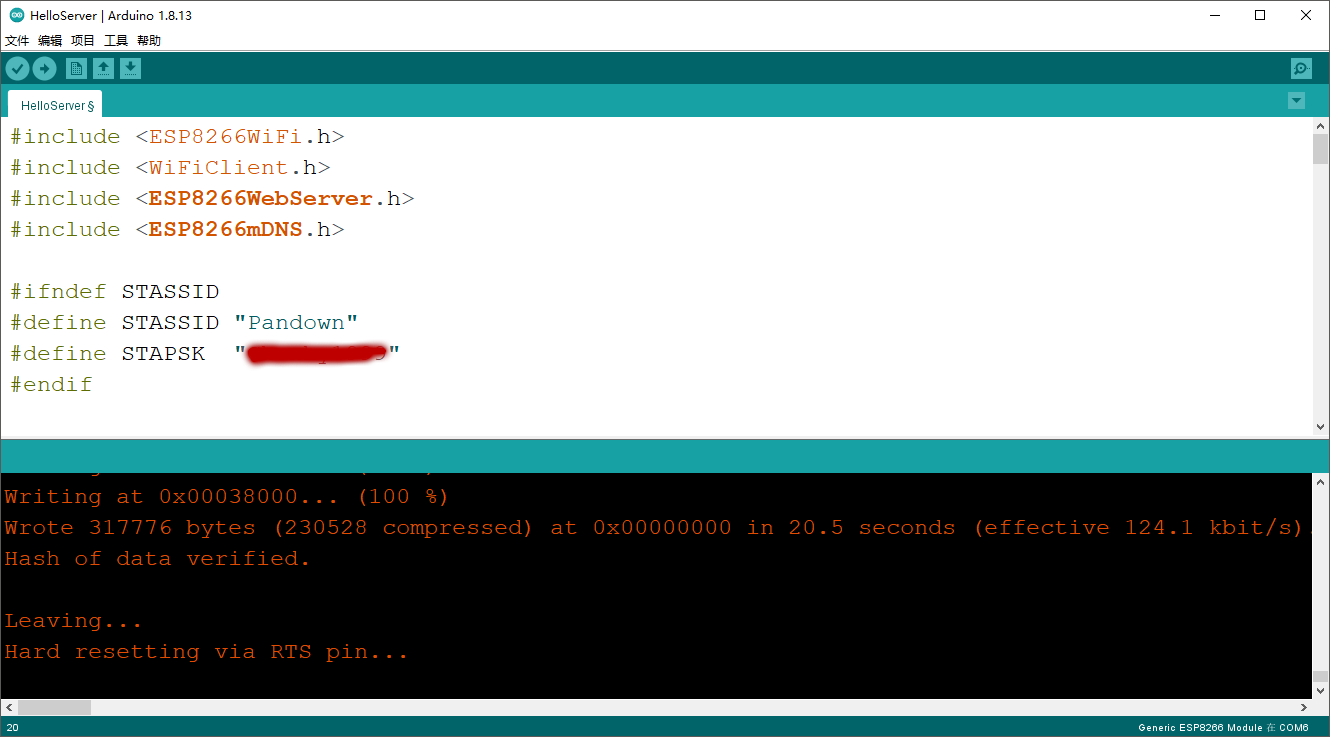
编译后,USB转TTL插入电脑,连接ESP8266,并且将IO0拉低,然后点击Arduino的上传即可,如果正确上传,则出现上图的上传成功,然后断点,把IO0悬空,打开 工具->串口监视器,然后上电,就能看到下列信息:
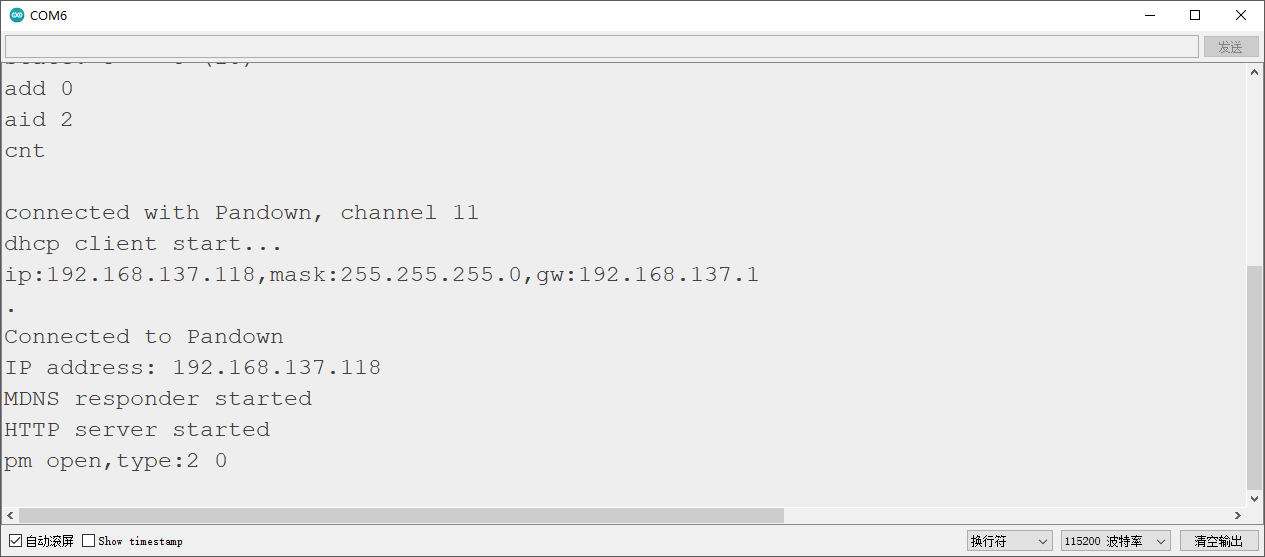
根据这个ip,可以在浏览器看到内容了。